MuleSoft is loaded with many connectors which makes the life of a developer easy. Among many such connectors, one important one is the AWS S3 Connector. This makes connecting to S3 easy and efficient.
Here, I will show how to create a file in S3!
Prerequisites:
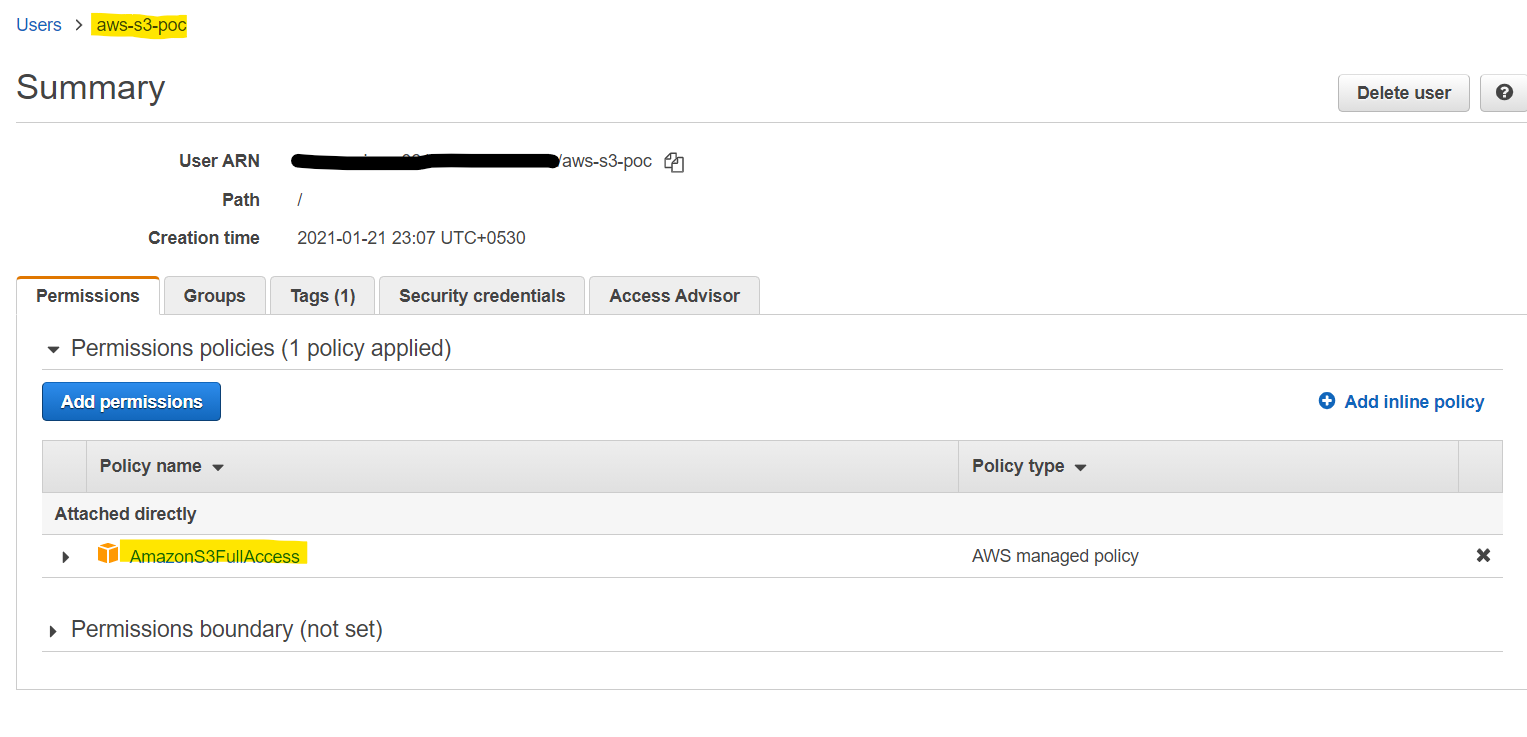
You will need an AWS account with S3 access. The best practice is to go to AWS IAM, and create a user with programmatic access to S3. This keeps your AWS resources safe.
- Here I have created a user aws-s3-poc and given AmazonS3FullAccess:
- Now we will create a bucket in S3. I have created one called mule-tk. Also, remember the region because it will be used later in the app.
That is good enough for us to create an app and write or read to this bucket.
Steps to write to S3:
- Create a Mule application in Anypoint Studio. I created one called aws-s3-poc
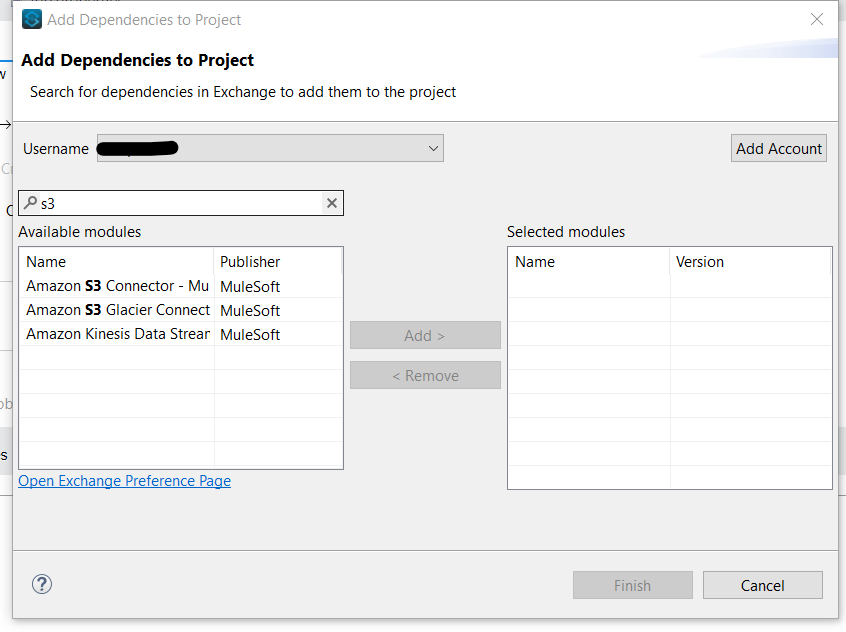
- The AWS S3 will not be available in modules so you need to add it from the Exchange
- Search for S3 as below. Select the S3 Connector and add it to the app
Another way is to add this dependency in the pom file:
<groupId>com.mulesoft.connectors</groupId>
<artifactId>mule-amazon-s3-connector</artifactId>
<version>5.6.4</version>
<classifier>mule-plugin</classifier>
- Create an HTTP Listener listening to a port
- Drag a Create Object from Amazon S3 connector
- The flow should look like below:
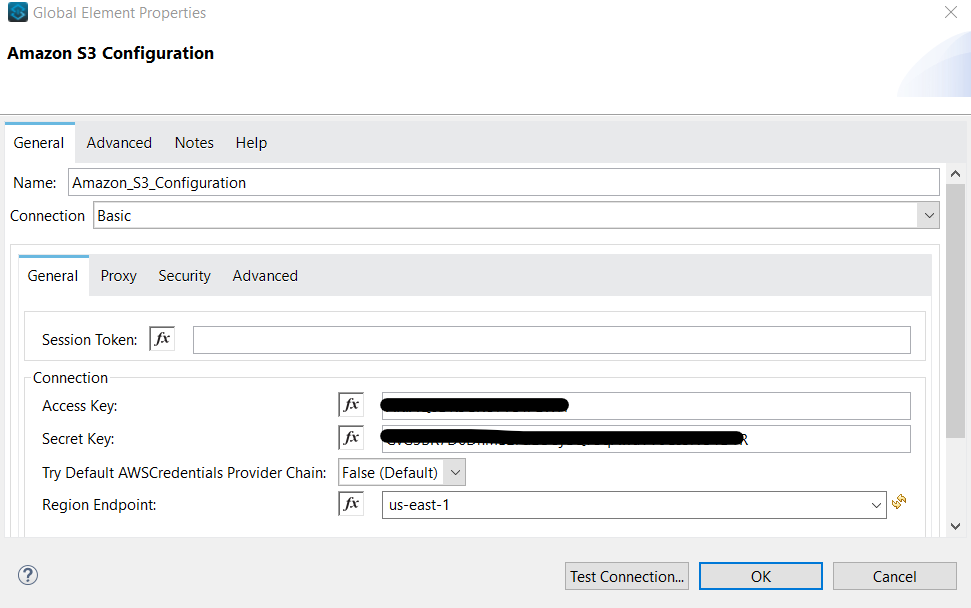
- Create an AWS S3 Connector Configuration by adding Access Key, and Secret, and use the same region you used while creating S3. In my case its us-east-1
- Now let's see what the Create Object configuration should look like:

The bucket name is the same as you created before.
I am taking key and Object content from the user. So the fileName attribute goes as a key which is nothing but the name of the file as it will appear in s3 and Object content is the payload we want to save.
- You can add another Transform Message to return a message to the client
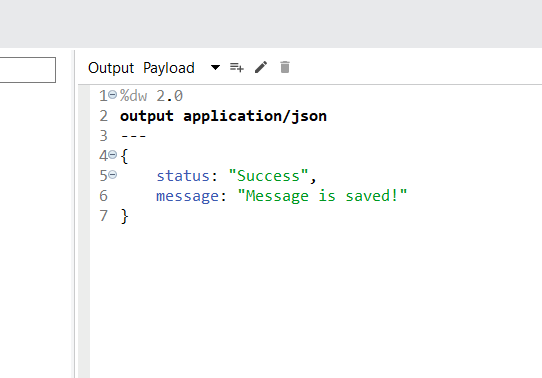
Finally, run the application.
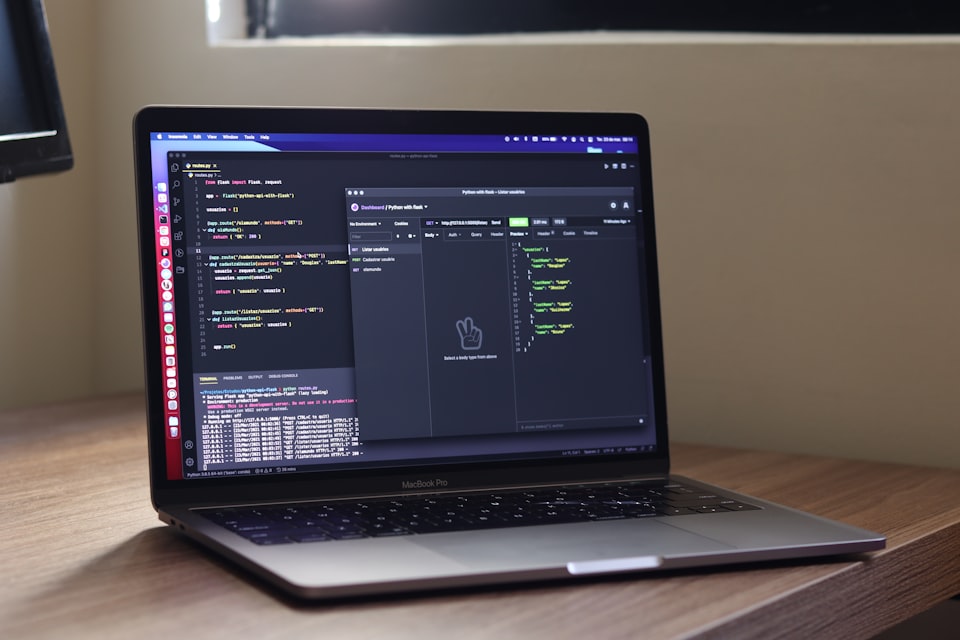
As you can see below, I sent a payload as :
    "fileName": "test.json",
    "message": {
        "name": "Tirthankar Kundu",
        "application": "MuleSoft"
    }
}
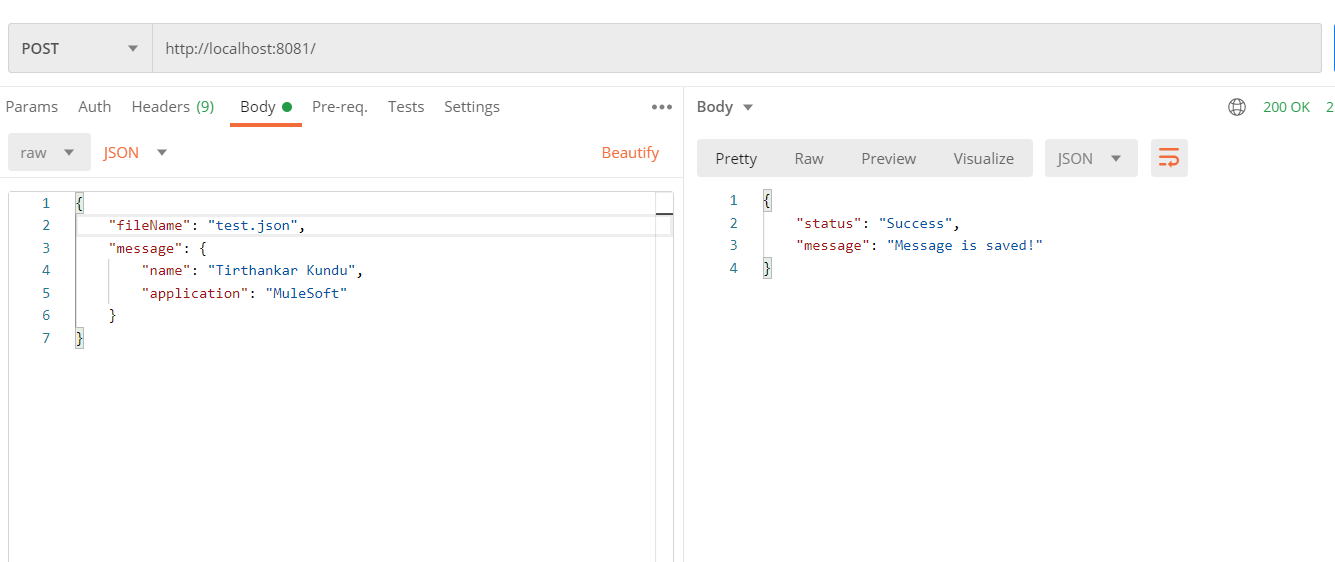
Here fileName is test.json and the message has my name and application in it. On sending we get back a response as a success
Now, Let us see what S3 bucket looks like:
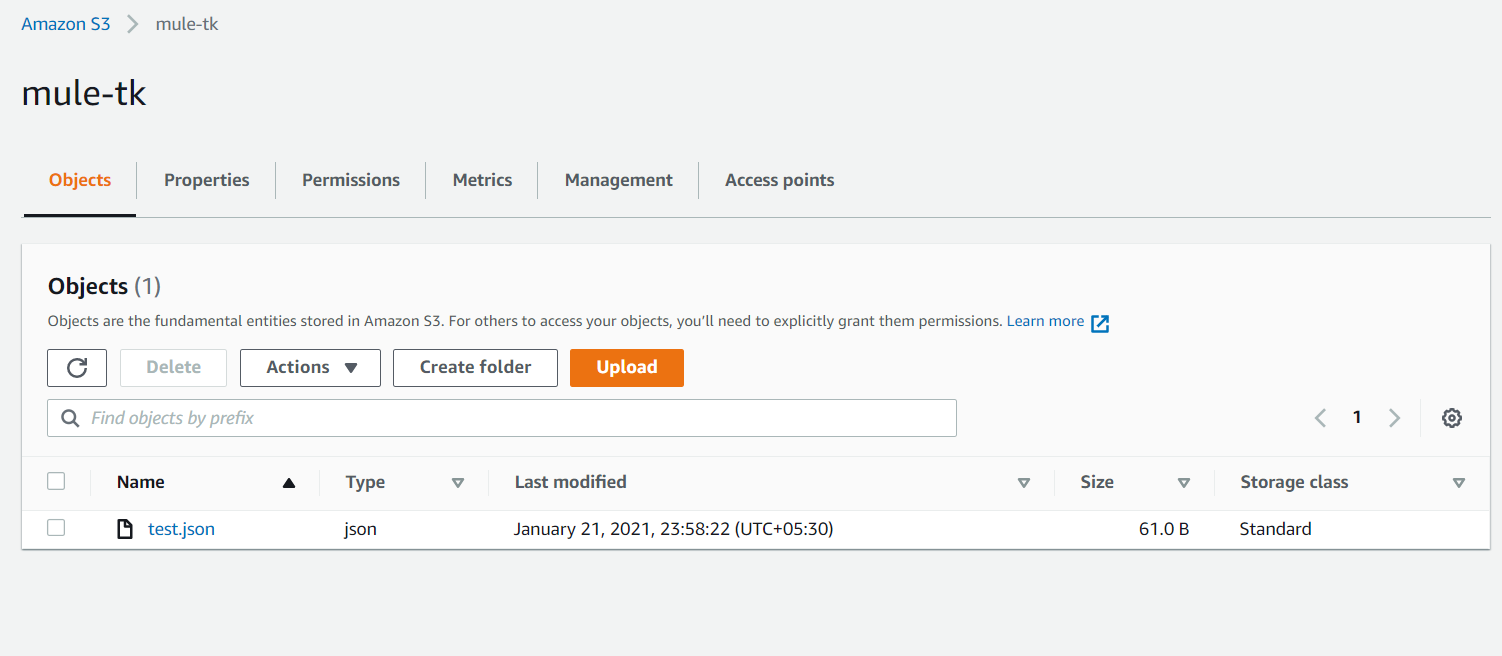
So we see that a test.json file is created in the bucket.
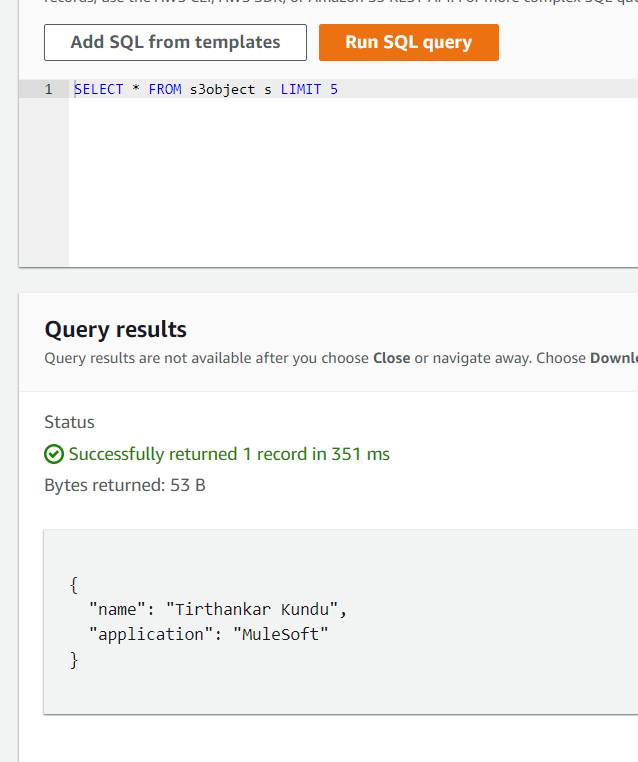
On querying this file we see the below response:
Thus, we were able to connect to write to Amazon S3 using MuleSoft within minutes.
Hope you like it!